Set Up: Lynx with Streamline
What You Do:
Customers must use the self-onboarding wizard inside Streamline and enable Lynx.
The Process:
| Actions | Who Does It | Timeline |
| Self Onboarding Wizard | Customer | Immediately |
| Tokens Created | Streamline | Immediately |
| Add Tokens to Lynx Account | Customer | Immediately |
| Enable Lynx Access Code to Display in Streamline. | Customer | Only When Ready to 'Go Live' w/ Lynx |
| Enable Lynx ID | Streamline | Reach out to Streamline Support for details on timing |
Third Party Integrations > Self Service Onboarding
| Step 1: | Click the 'Self Service Onboarding' option under the Third-Party Integrations section when logged into Streamline |
| Step 2: | Find Lynx (Formerly VirtualKEY) on the partner list |
|
| Step 3: | Agree to Streamline's T&C |
| In Lynx: | Add the Streamline Integration Details |
| Step 1: |
In the Lynx Portal, access the Integrations page. |
| 1. | Click the Settings icon. |
| 2. | Click Integrations on the left side. |
| 3. | Click Add Integration. |
| Step 2: |
Enter the Integration Details you receive from Streamline. |
| 1. | Category: PMS/Booking Site |
| 2. | Partner: Streamline |
| 3. | Integration Name: Create a name for the Integration. |
| 4. | Client ID: Copy and paste the Client ID provided by Streamline |
| 5. | Client Secret: Copy and paste the Client Secret provided by Streamline |
| 6. | Click Add to Save |
|
Step 3 : (optional) |
Once the Integration is added, Click the "refresh" Button as in the image below |
| 1. |
Map the stays between Streamline(left) and Lynx(right) |
| 2. | Click "Save" |
| Step 4 : | Finally, you want to map field from Streamline into Lynx. This will prevent you having to manually input information. |
| 1. |
Click the pencil icon to make changes. |
| 2. | Open the drop downs for any fields you wish to map. For this example, we're mapping the "directions to the property" field from Streamline into the "finding the property" field for Lynx. |
| 3. | Click "Save" |
| 4. | Repeat the process with any fields you want to map. If there is a field you'd like to map to Lynx but there isn't a Lynx field that fits it, you can create your own custom field in the drop down. This Will open the following screen. Name your custom field and select if you want single or multi-line text. Then, choose if you want to share that field across all groups, or just certain ones and hit save. |
| 5. | Scroll through the 4 pages of fields to make sure you get everything mapped how you like. |
| 6. | Click "Save" to finish |
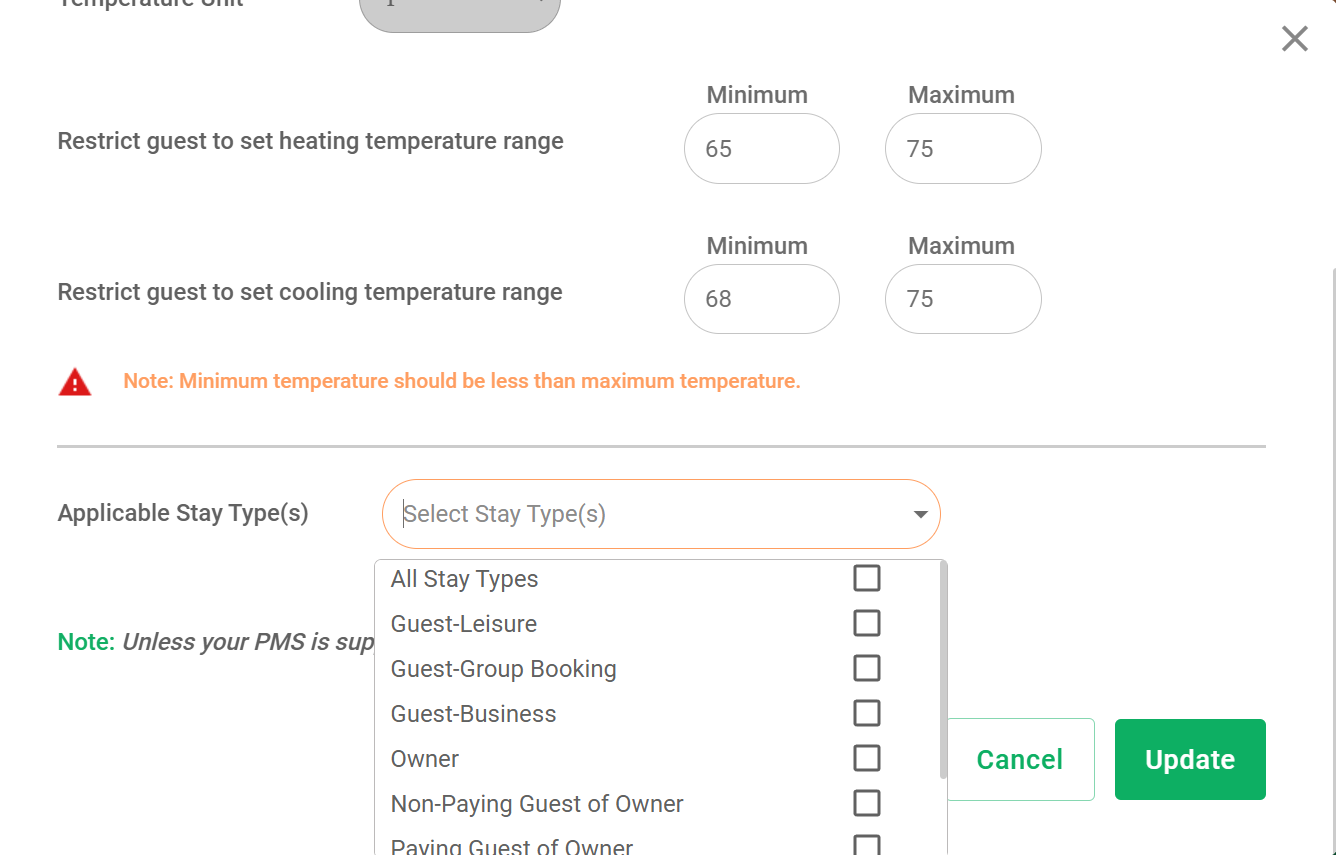
With the new updated streamline API, you will be able to select smart rules based on the
reservation stay type.
Important:
Make sure in your Streamline account the following setting "Property Check-In/Out times"
Is enabled only then Lynx will be receiving Check-in/Checkout information from Streamline.
Need help on the Streamline Onboarding Wizard? Reach out to your Streamline Account Manager or Customer Support.
Learn how to map fields from Streamline to Lynx after you integrate your Streamline account on Lynx
Comments
0 comments
Article is closed for comments.